It’s not long ago that a friend of mine found her old Game Boy from back in the days. Her idea was to give that device from 1989(!) to her nephew who’s 8 years now and is starting to show interest for that sort of things. Problem is that the dot matrix display has a few columns that aren’t working. Let’s see what we can do!
I had the same problem with my device a while ago and I showed it to my friends from our local makerspace (https://www.attraktor.org/). They said, that it is a common problem and it isn’t too hard fix. And they were right! With their support reviving my Game Boy was just a matter of an hour max.
Here we go! Let’s fix another one!
What you’ll need
- soldering iron
- small phillips screwdriver
- small flat head screwdriver
- Y1 tri-wing screwdriver
Step by step
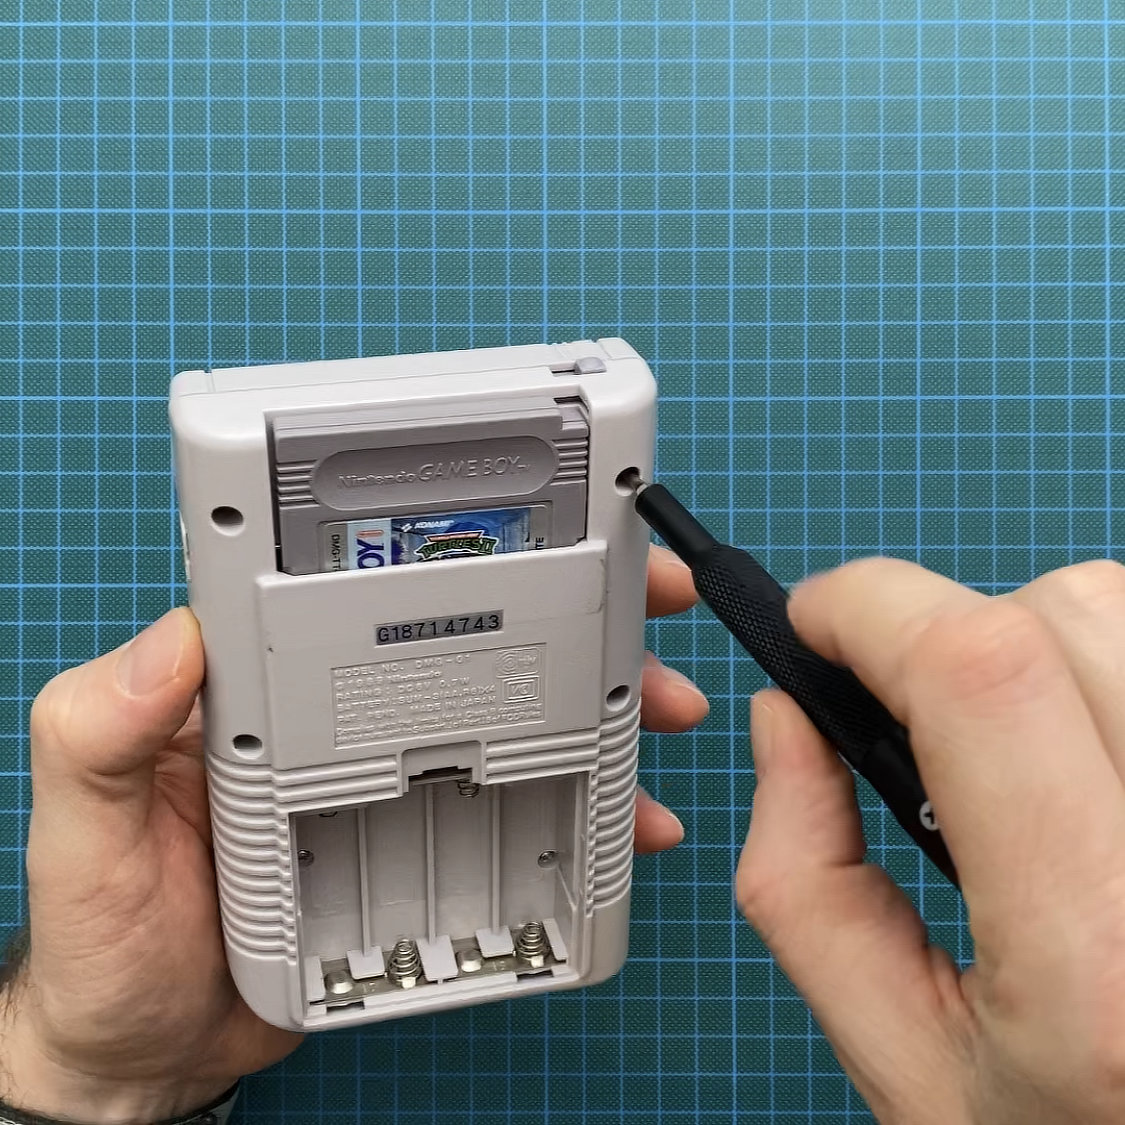
Step 1: Open the device
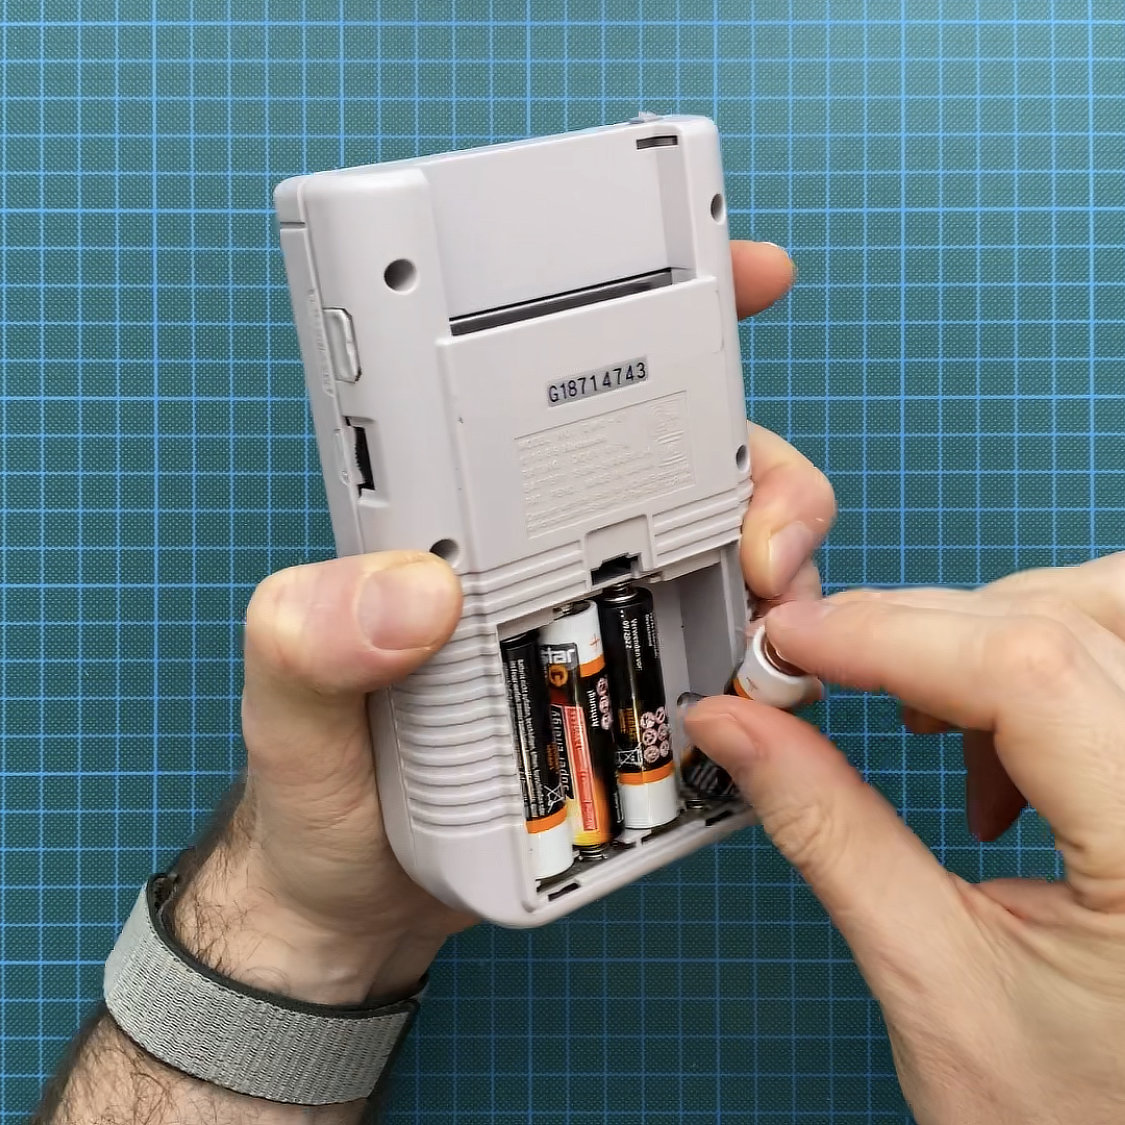
Open the battery compartment and remove all batteries. Next, remove the 6 screws from the back using the tri-wing screwdriver. (Note: I’ve seen Game Boy versions where these are phillips screws.)
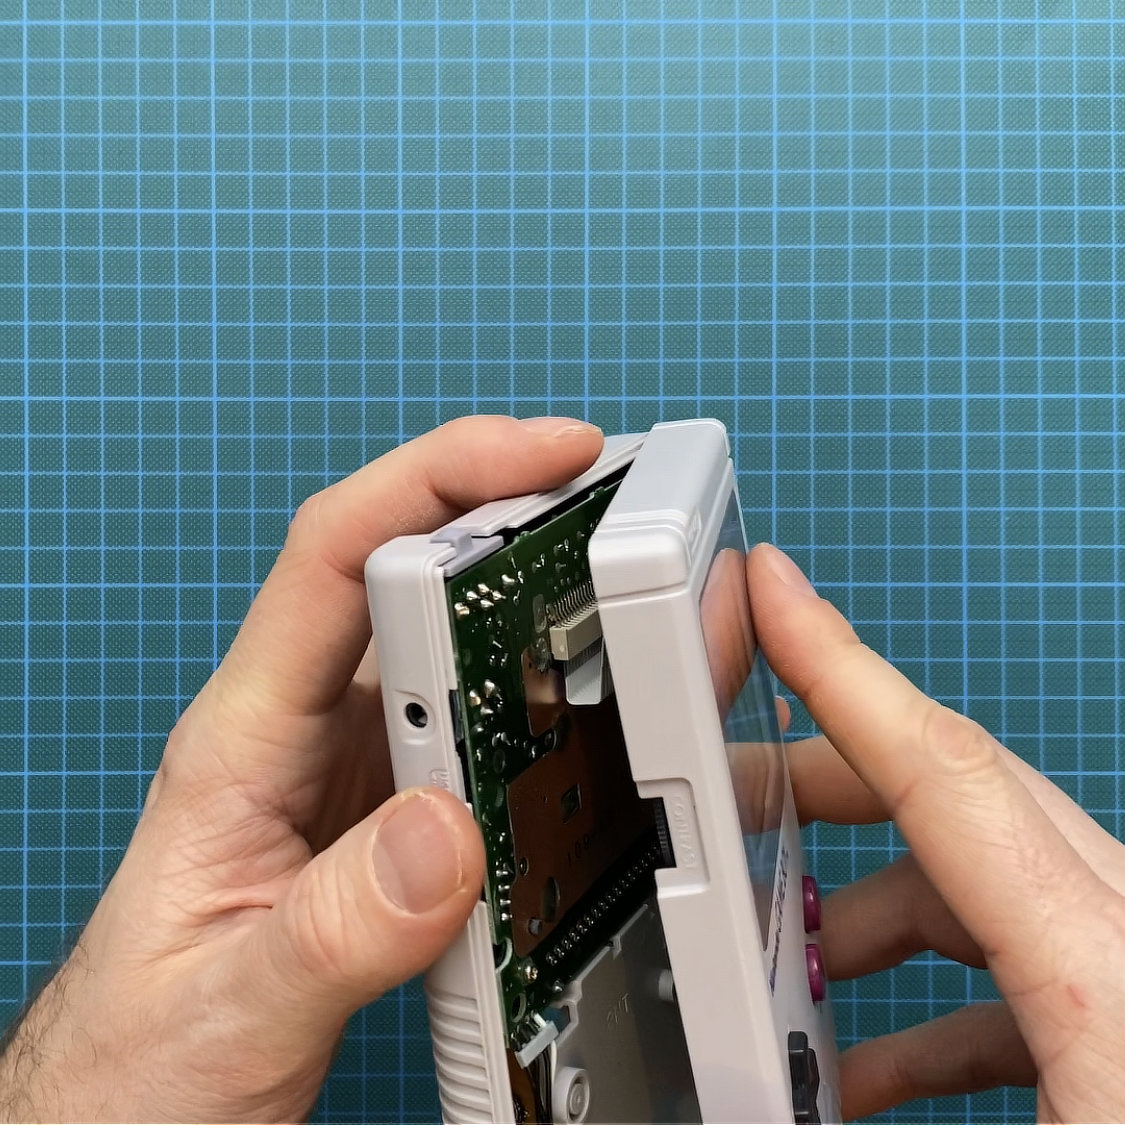
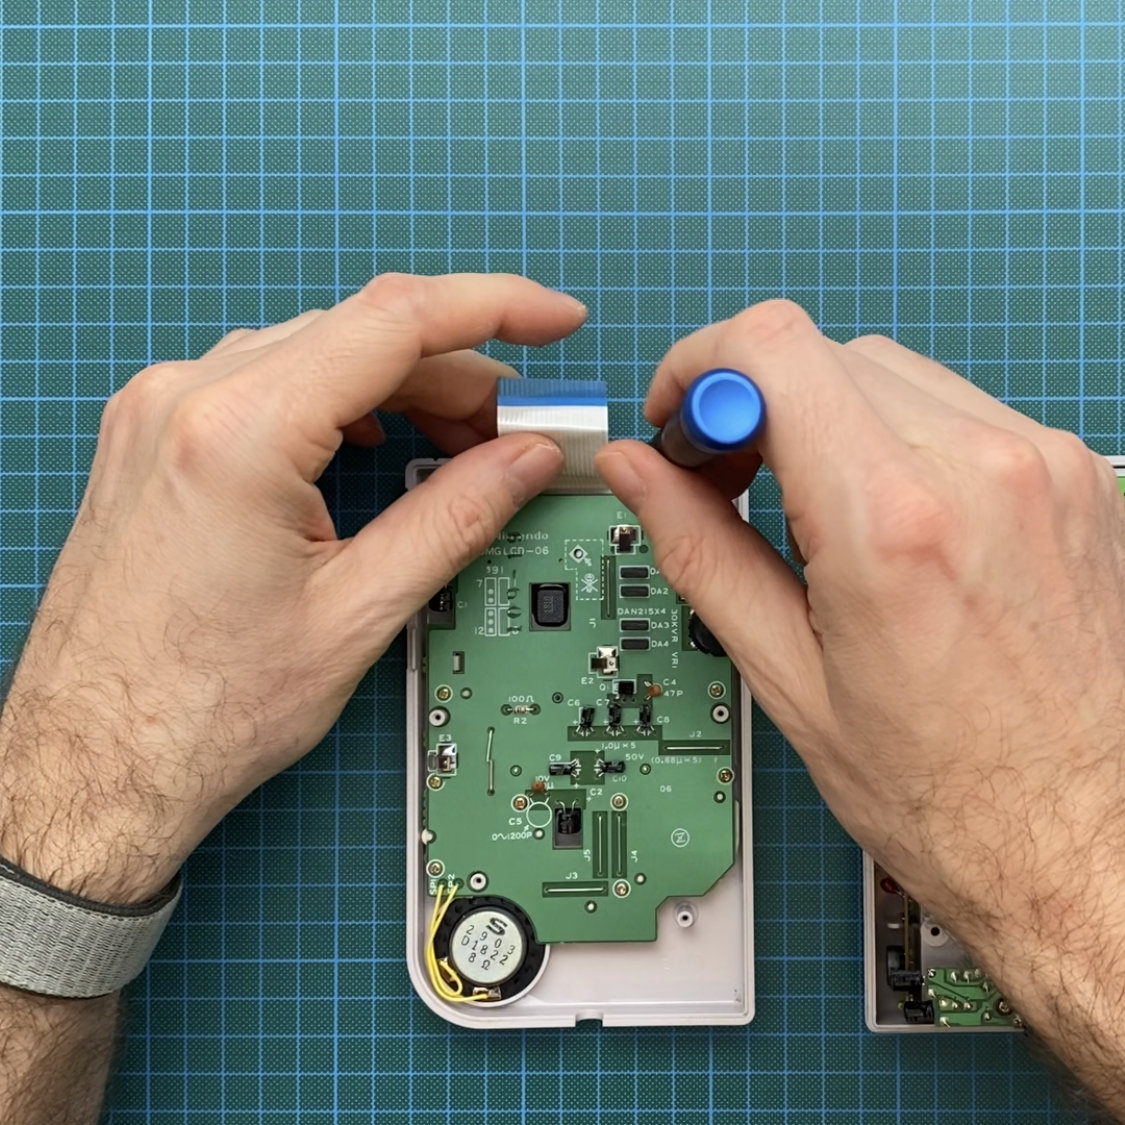
Carefully open the case and gently remove the cable from the socket. Alway be cautious when handling the ribbon cable. It’s really fragile.

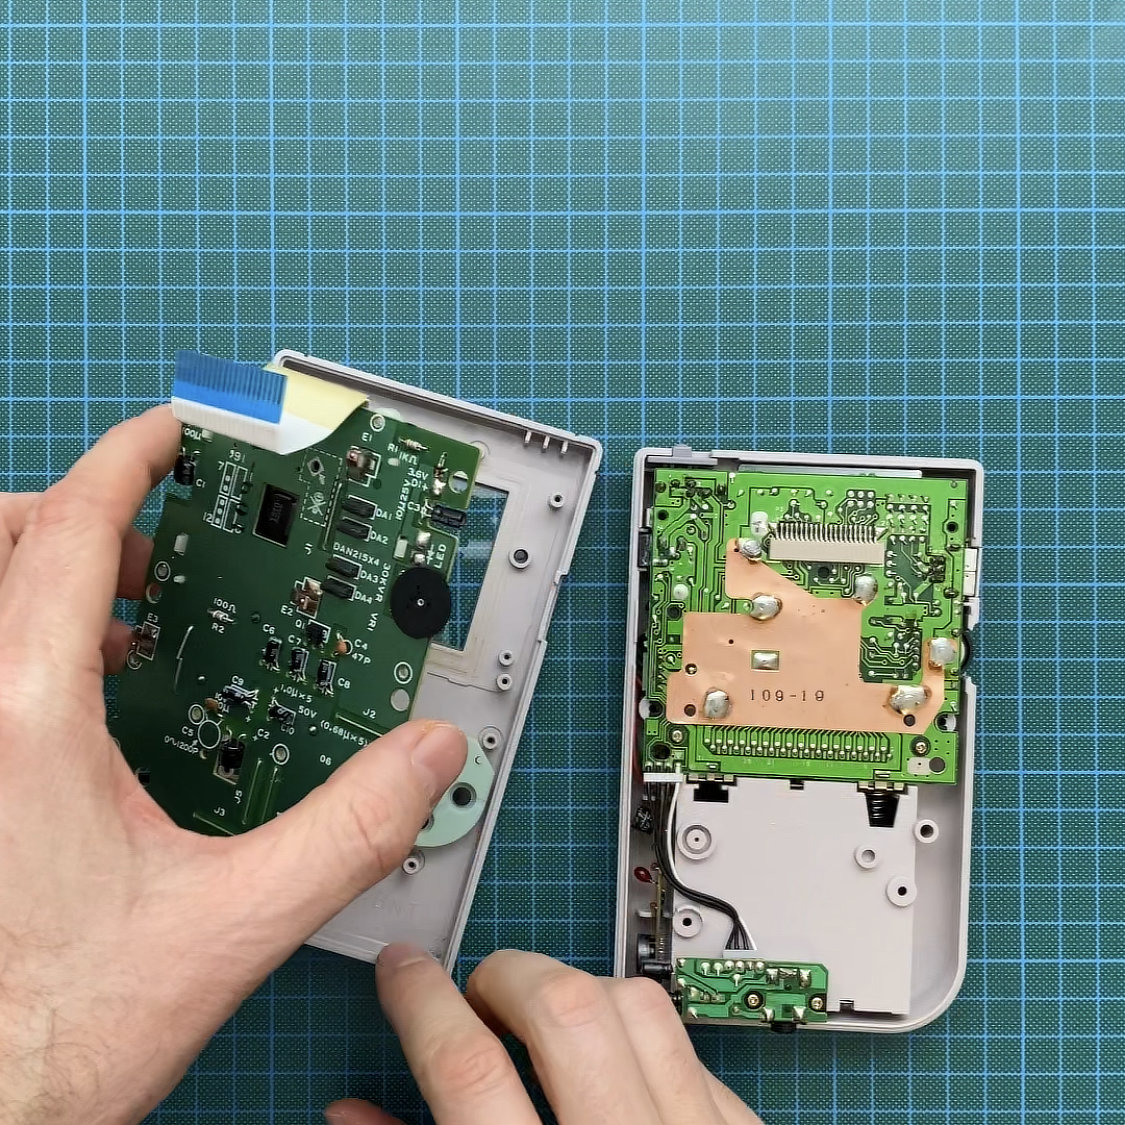
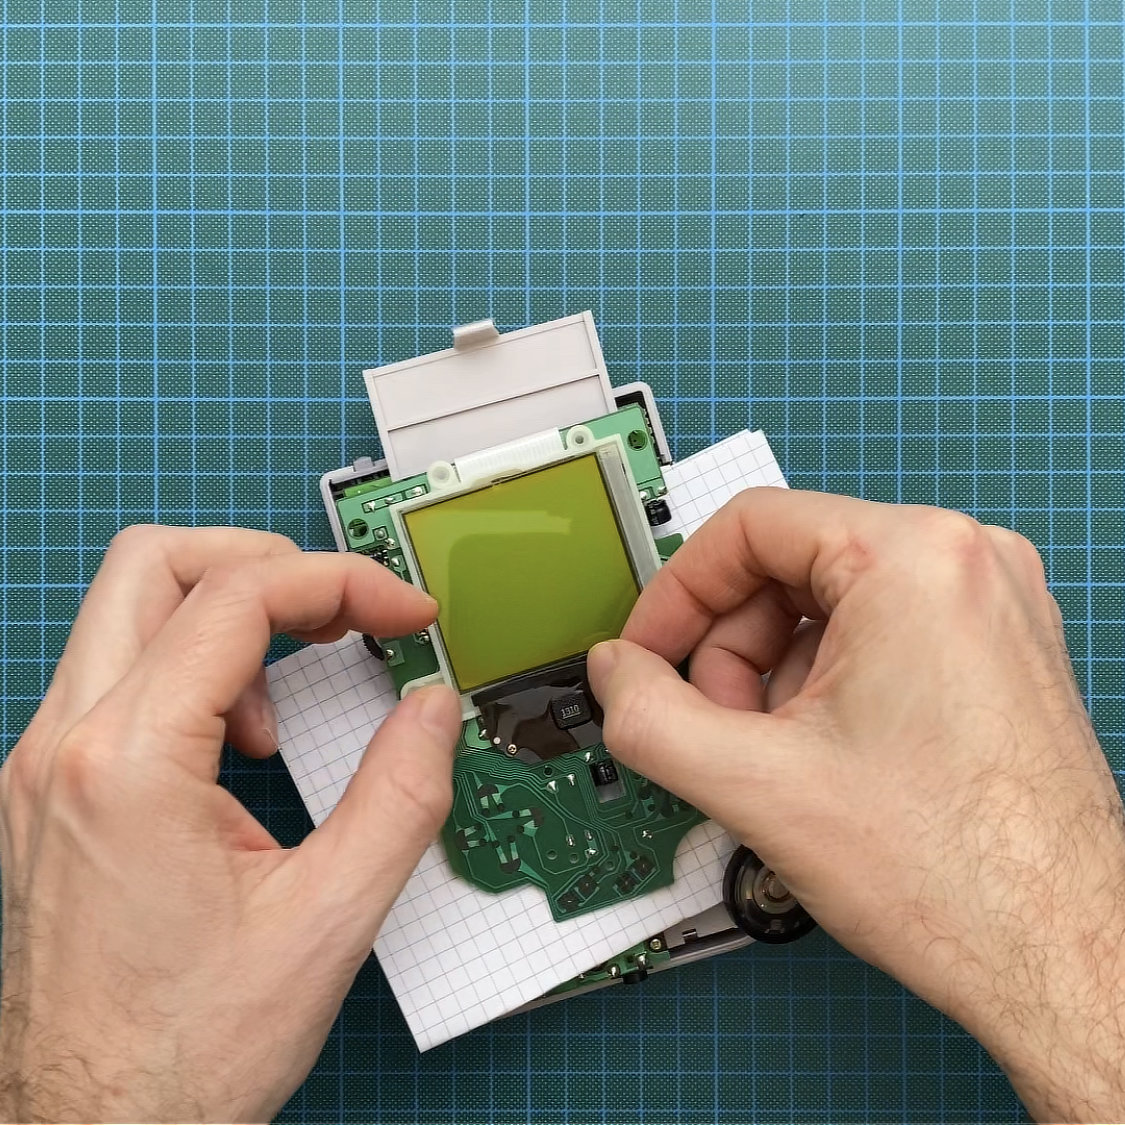
Step 2: Unmount the display PCB
Remove all 10 phillips screws on the back of the display PCB. Now you can carefully remove the PCB and the connected speaker. Use the flat head screwdriver to gently remove the rubber strip from the bottom of the display. Make sure to get rid of any glue residue.
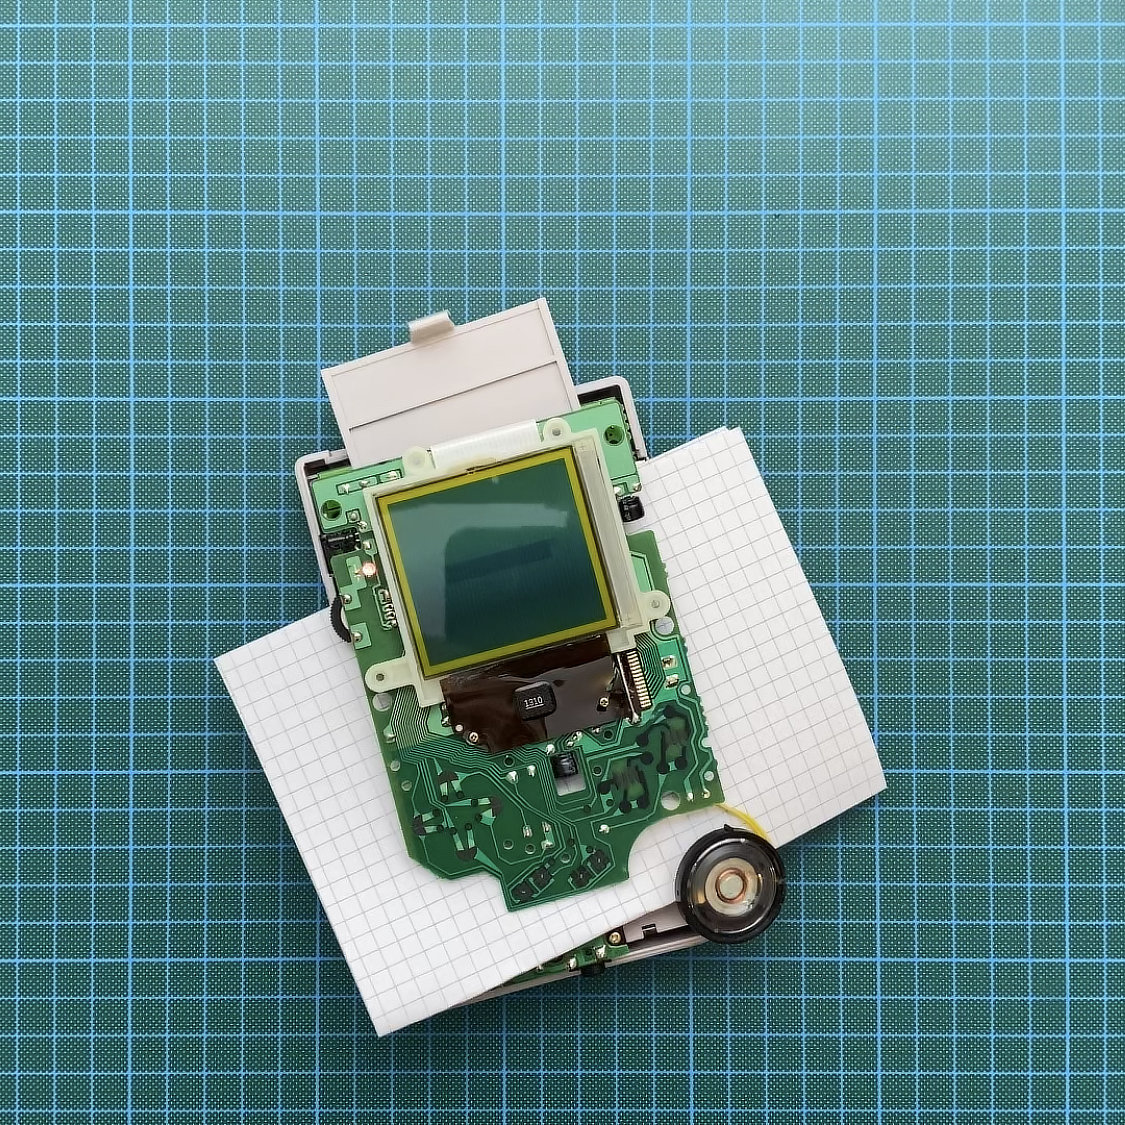
In order to monitor your progress you need to reattach the display cable to the socket. Take a piece of paper and put it between both PCBs to prevent short circuits.
Now you can insert the batteries again and switch the device on. Make sure to turn the contrast up (small wheel on the left).


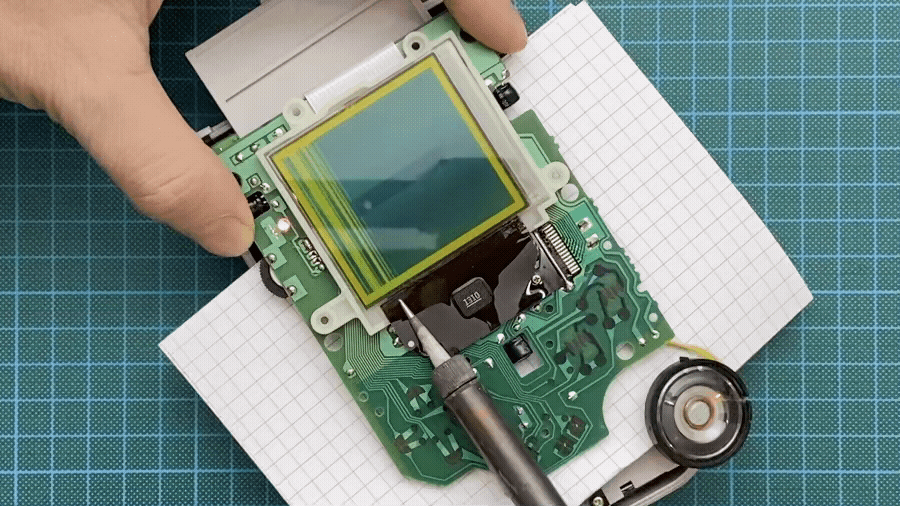
Step 3: Repair dead vertical lines
Heat up your soldering iron to about 200 °C and move it below the defect display columns on the ribbon wire connections. Make sure to keep moving to prevent overheating.
Caution: Do not touch any other parts with the hot soldering iron!
This procedure will restore the faulty connections. Be patient! It may take a while until all columns work again. Always keep an eye on the display. Sometimes it helps to heat up the connections and then quickly cool it down by blowing on it.
When you’ve restored all connections and all artifacts are gone, turn off the device.

Step 4: Reassembly
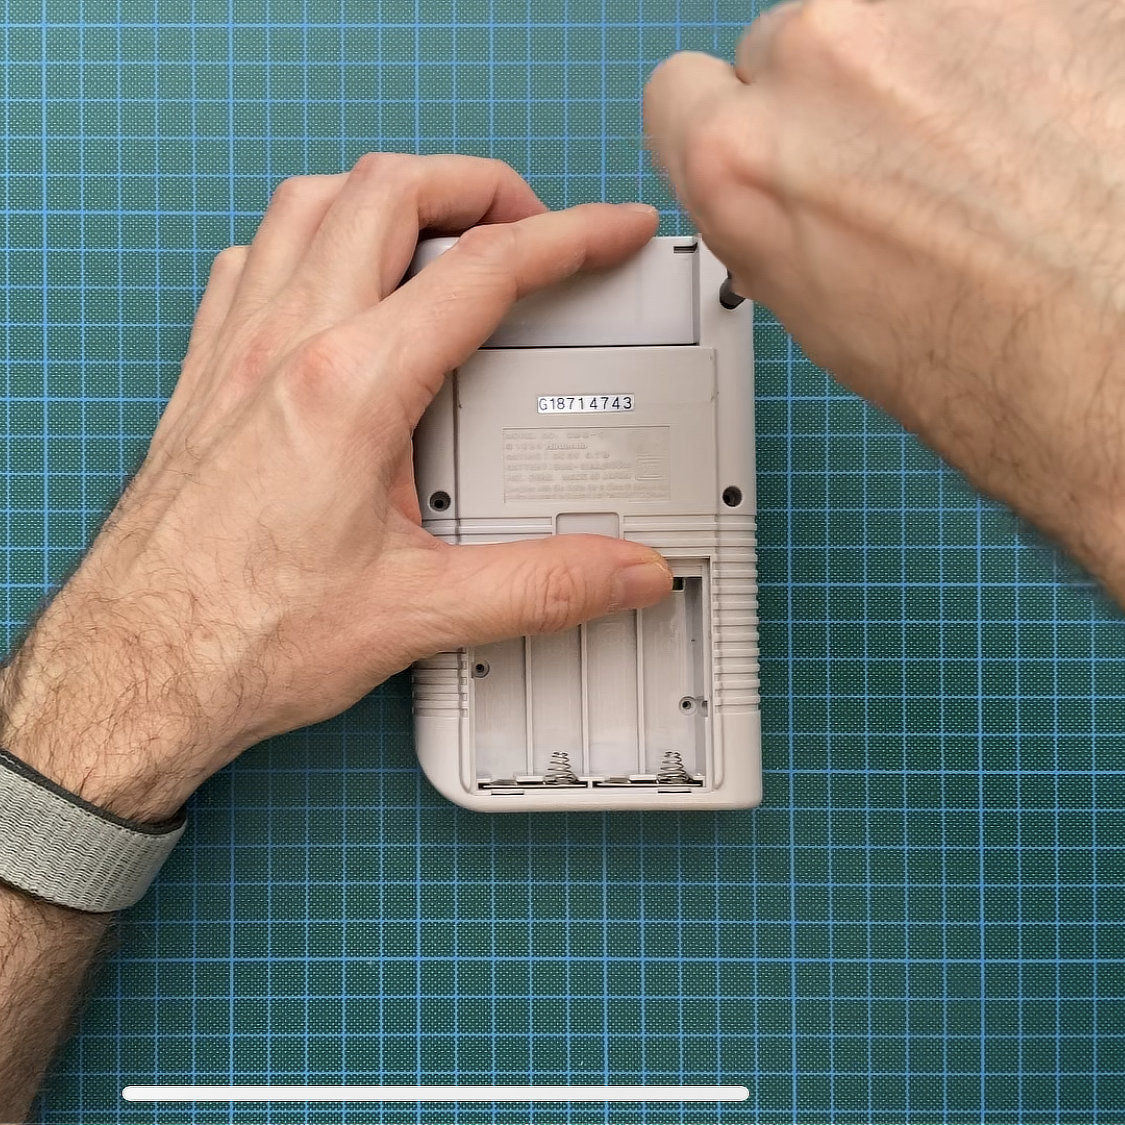
First remove the batteries again. Now you can reapply the rubber strip onto the cable connections. (Only if it is still sticky. Otherwise just leave it away.) Gently remove the ribbon cable from the socket and put the display PCB and speaker back in place. Use the 10 phillips screws to mount the display PCB back to the case. Now take the front part of the case, insert the ribbon cable and carefully close the case.
To see if everything is still working, insert the batteries and switch on the device. If all is good, remove the batteries and mount the back of the case.
Insert the batteries and you’re done!


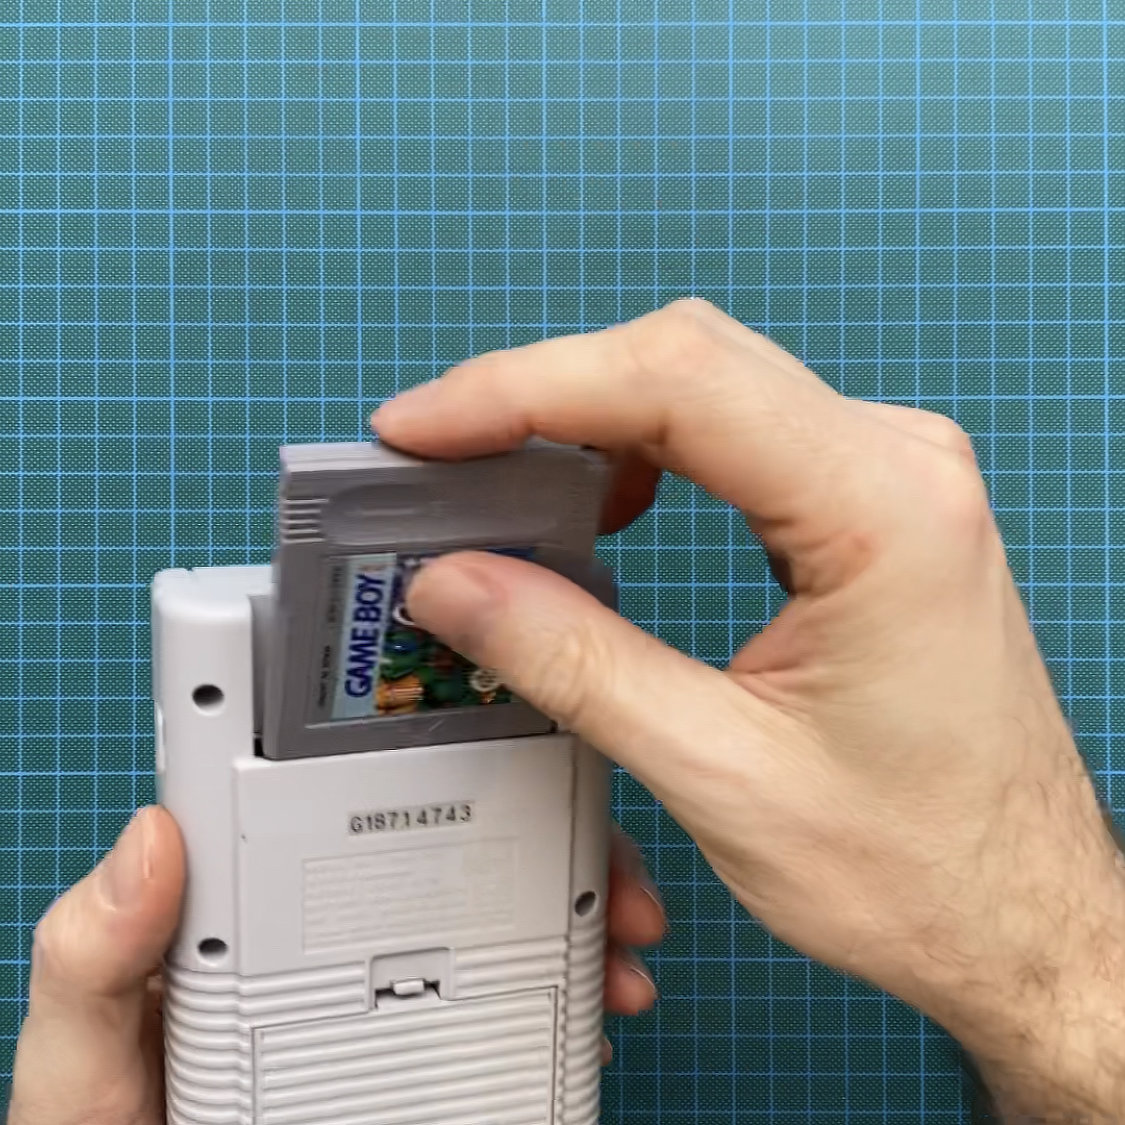

Play!
Ok, so this one is working again. Lucky nephew! I hope yours is working too and you can deep dive into nostalgia inserting your favorite cartridges from back in the 90’s.