If you are reading this, chances are that you’ve heard of the Arduino platform before. It is beginner friendly and comes with it’s own IDE. There is a lot of documentation and it has a thriving community which guarantees a frictionless start for all hardware hacking newcomers.
But if you are dealing with more demanding projects (e.g. audio hardware) you’re quickly running into performance issues.
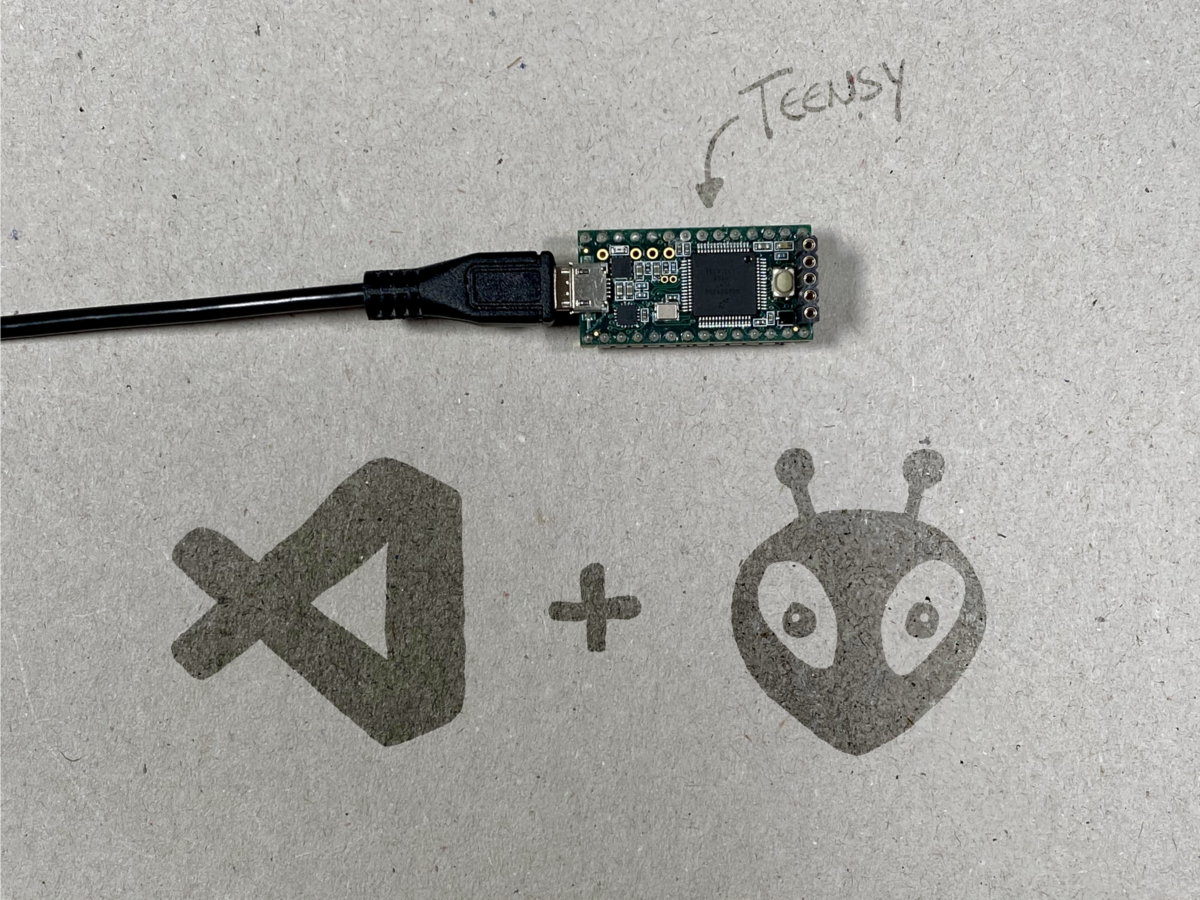
Luckily there is a powerful Arduino-compatible hardware called “Teensy” to the rescue. Instead of an Atmel microntroller the Teensy platform uses ARM Cortex chips since revision 3.0. But most of the Arduino framework has been ported, so migrating your projects is pretty straight forward.
The Arduino IDE is very easy to start with and you do not have to install gigabytes of bloatet coding environments. But if you’ve been coding before, you’re going to feel very limited pretty soon. For example there is no such thing as auto-completion, which you don’t want to miss these days.
For me the best alternative is Visual Studio Code, which is an open-source code editing tool created by Microsoft. It has an active community and features a lot of plug-ins for customization.
One plug-in is particularly useful for hacking embedded systems – PlatformIO. It supports a wide range of microcontroller boards. Among those is the Teensy.
In the following I’ll give a quick run down on how to setup Visual Studio Code with PlatformIO in order to be up and running for your first experiments.
Let’s go!
1. Installing Visual Studio Code
Download Visual Studio Code for your platform here:
https://code.visualstudio.com
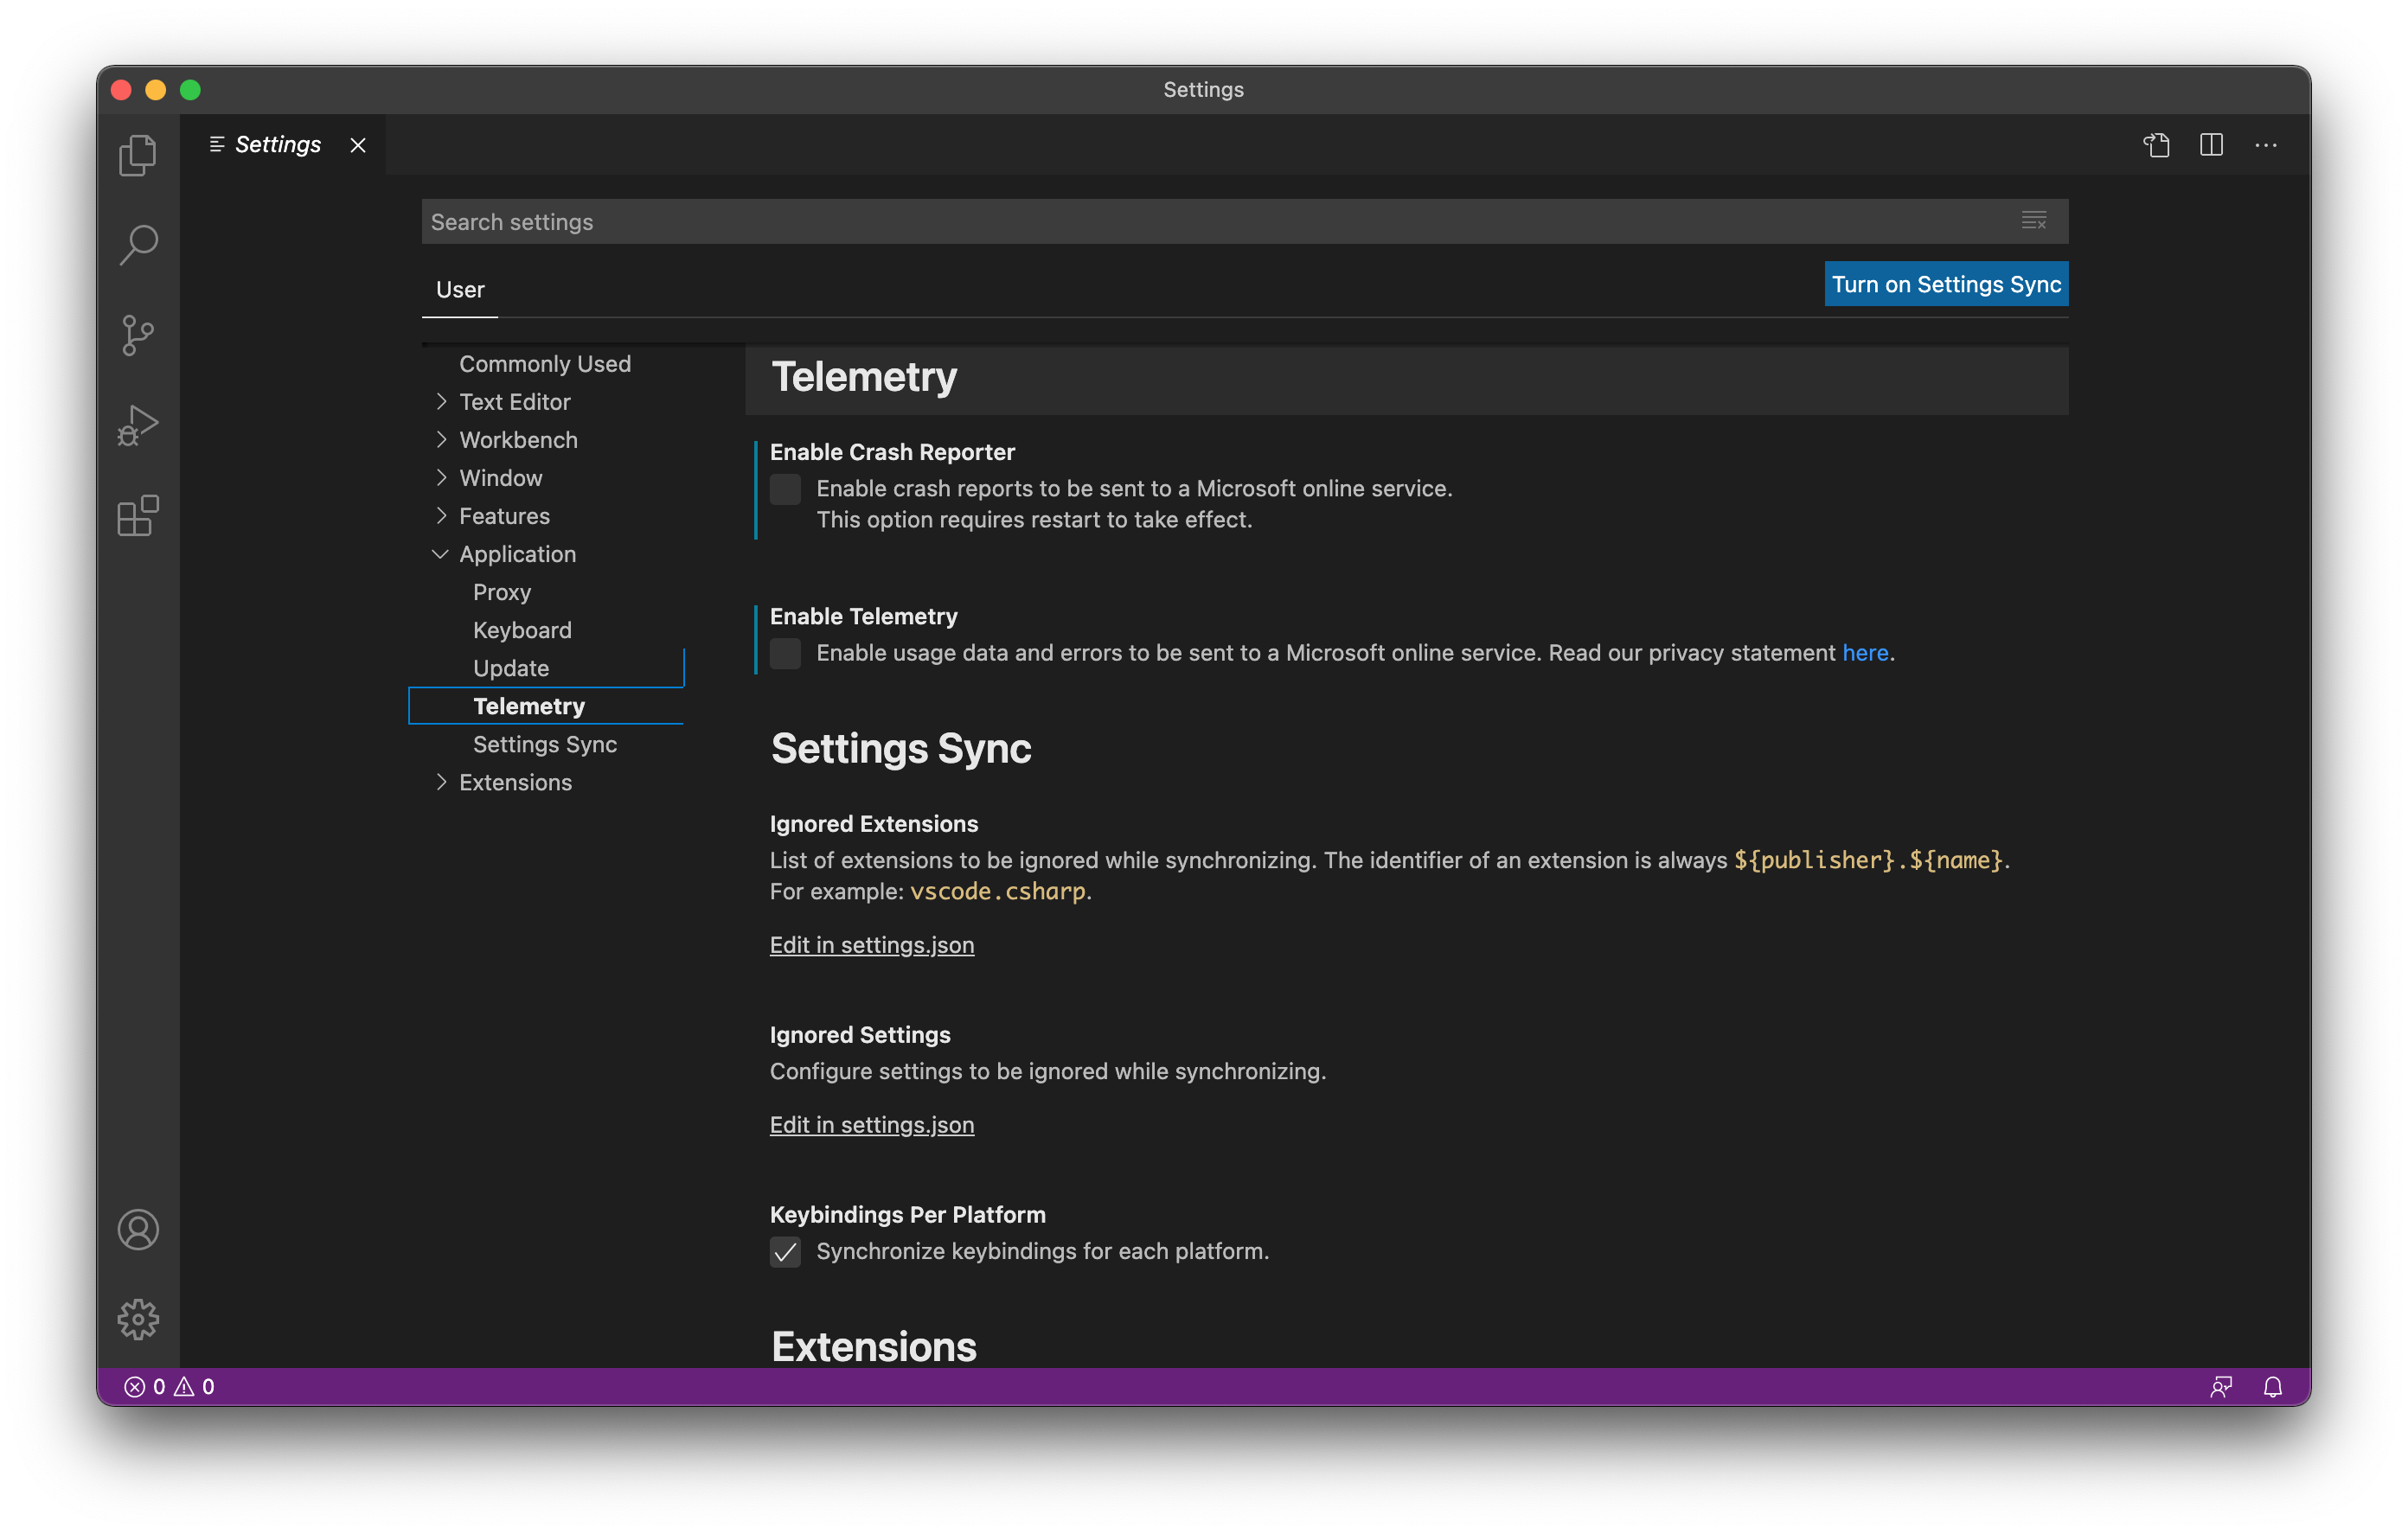
Run the installer and follow the instructions. If you don’t want to send your analytics data to Microsoft you can opt-out in “Settings > Application > Telemetry”:
2. Installing the PlatformIO plug-in
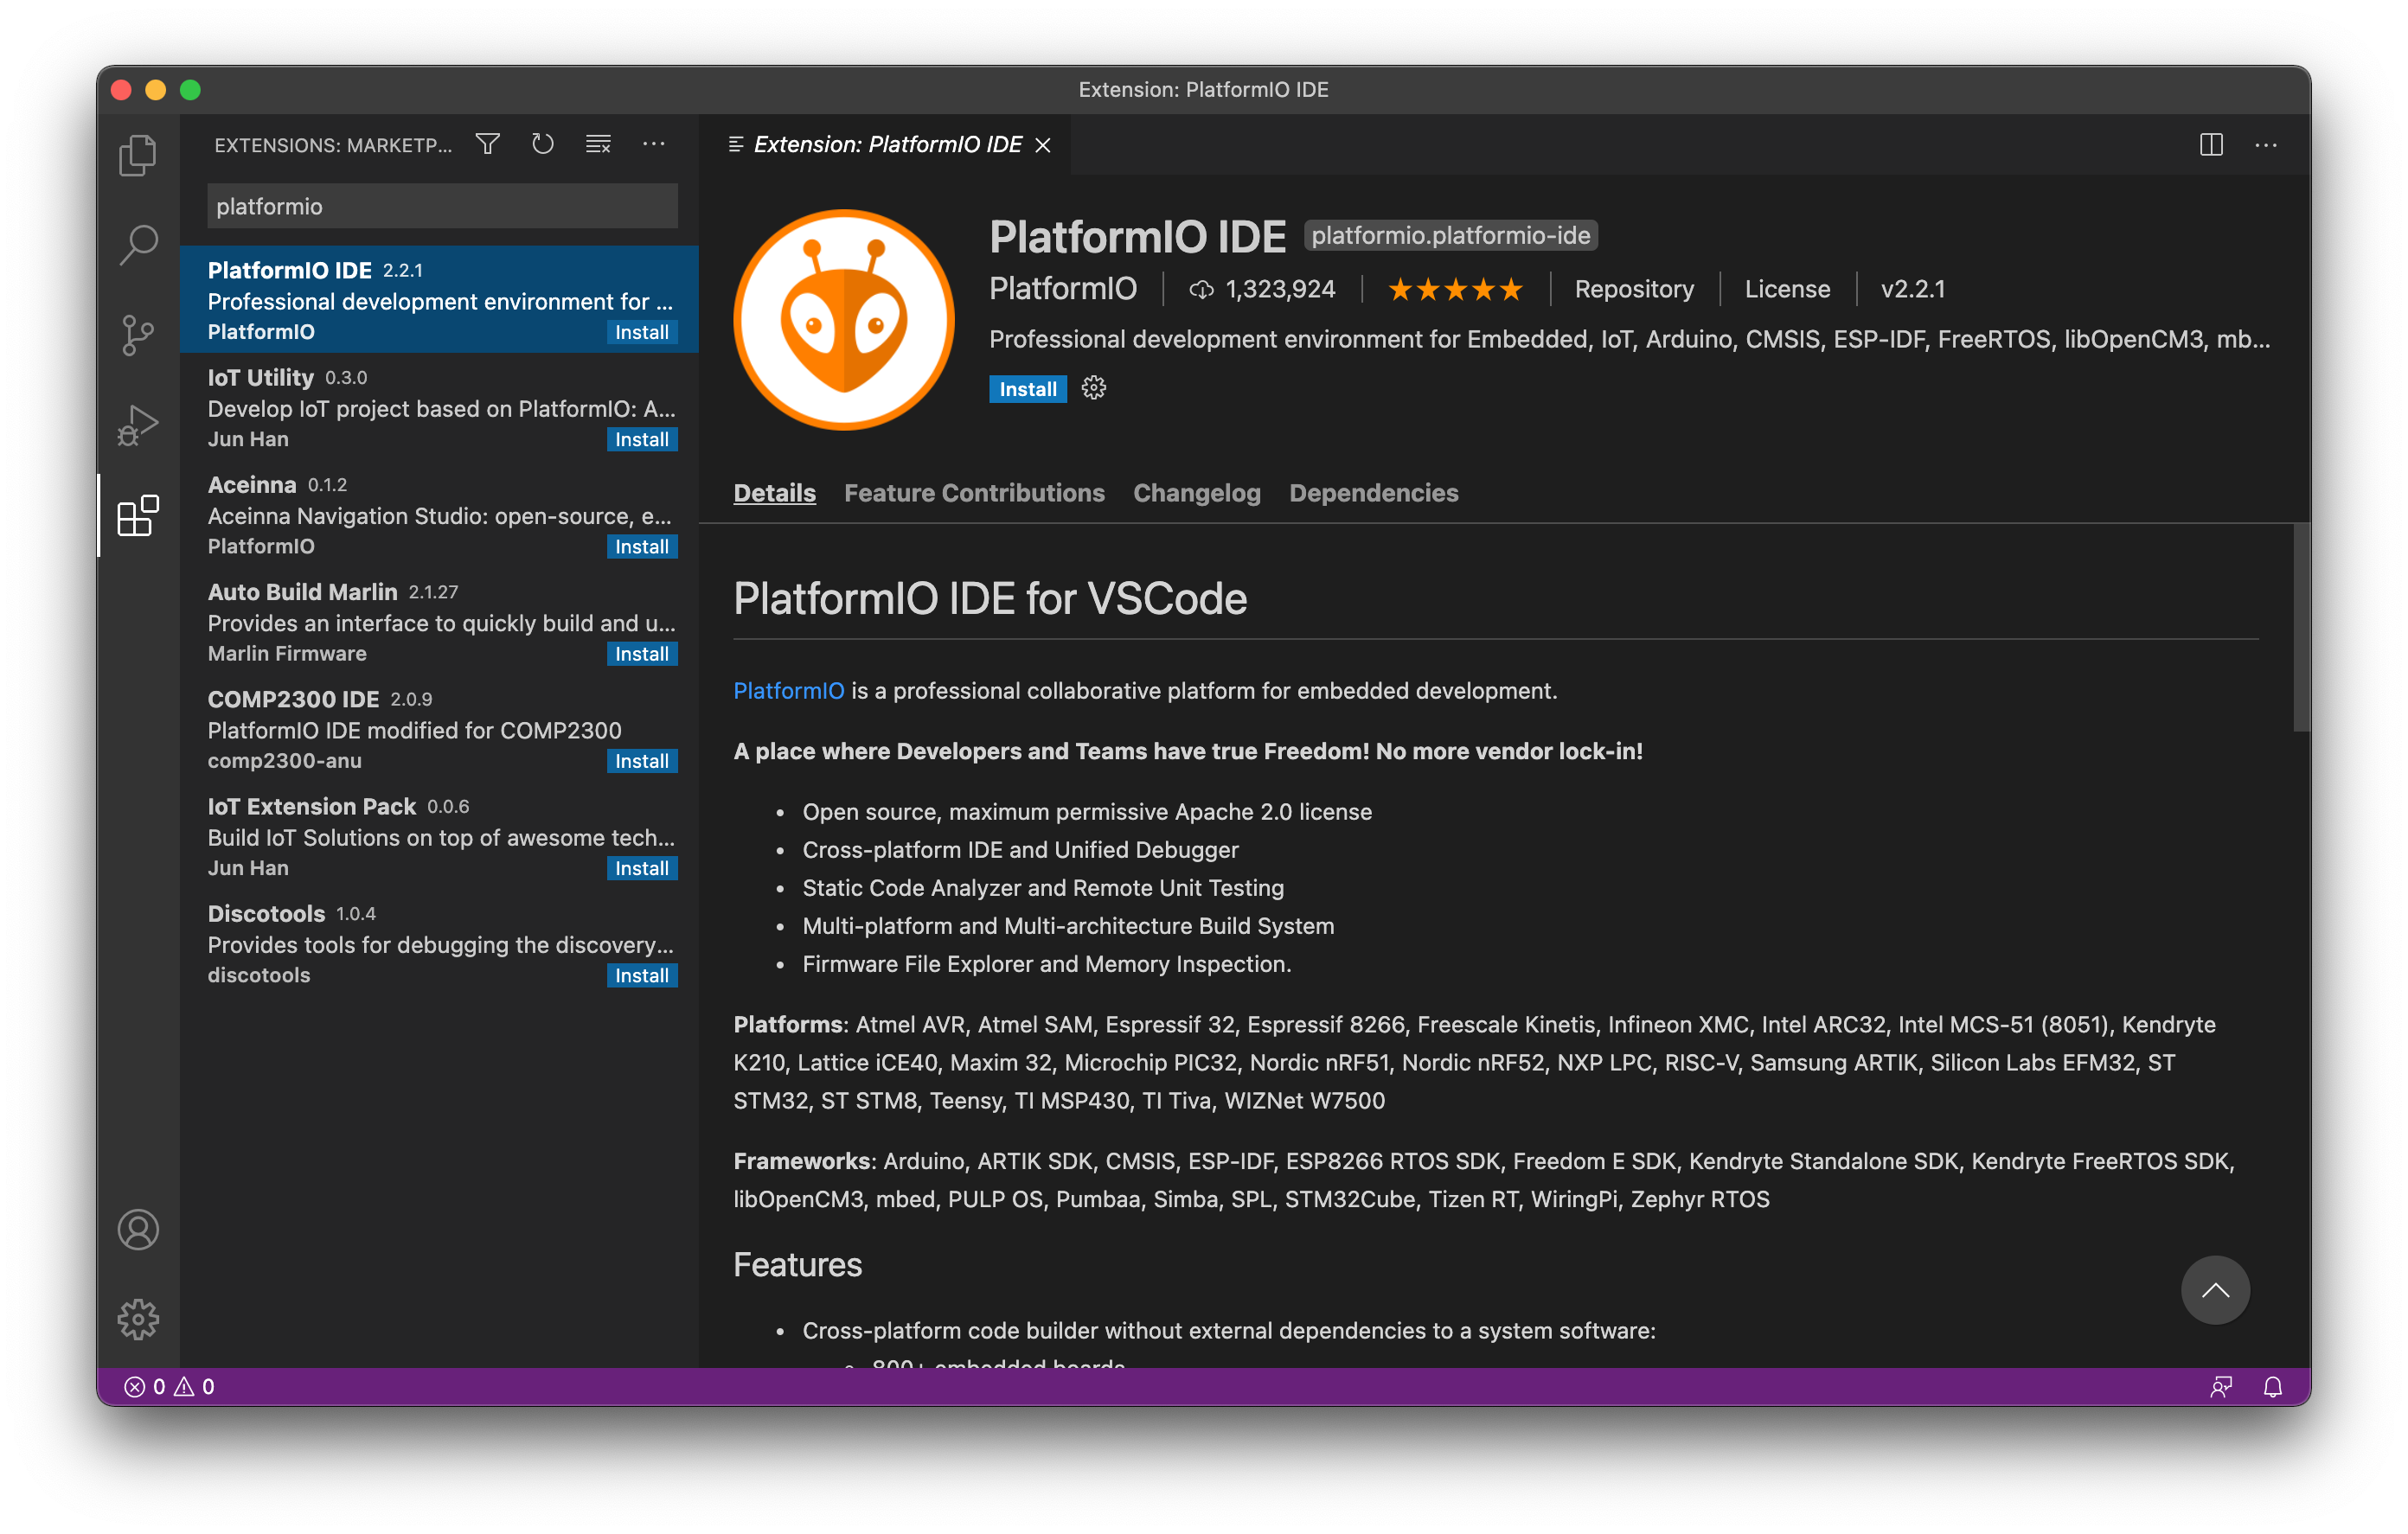
Open the extension marketplace by clicking the extensions icon (four quads) or by using the shortcut CTRL+SHIFT+X (macOS: CMD+SHIFT+X).
Search for “platformio” and click on “Install”. The installation may take a while. You’re going to be asked to restart VSC afterwards.
3. Creating a first project
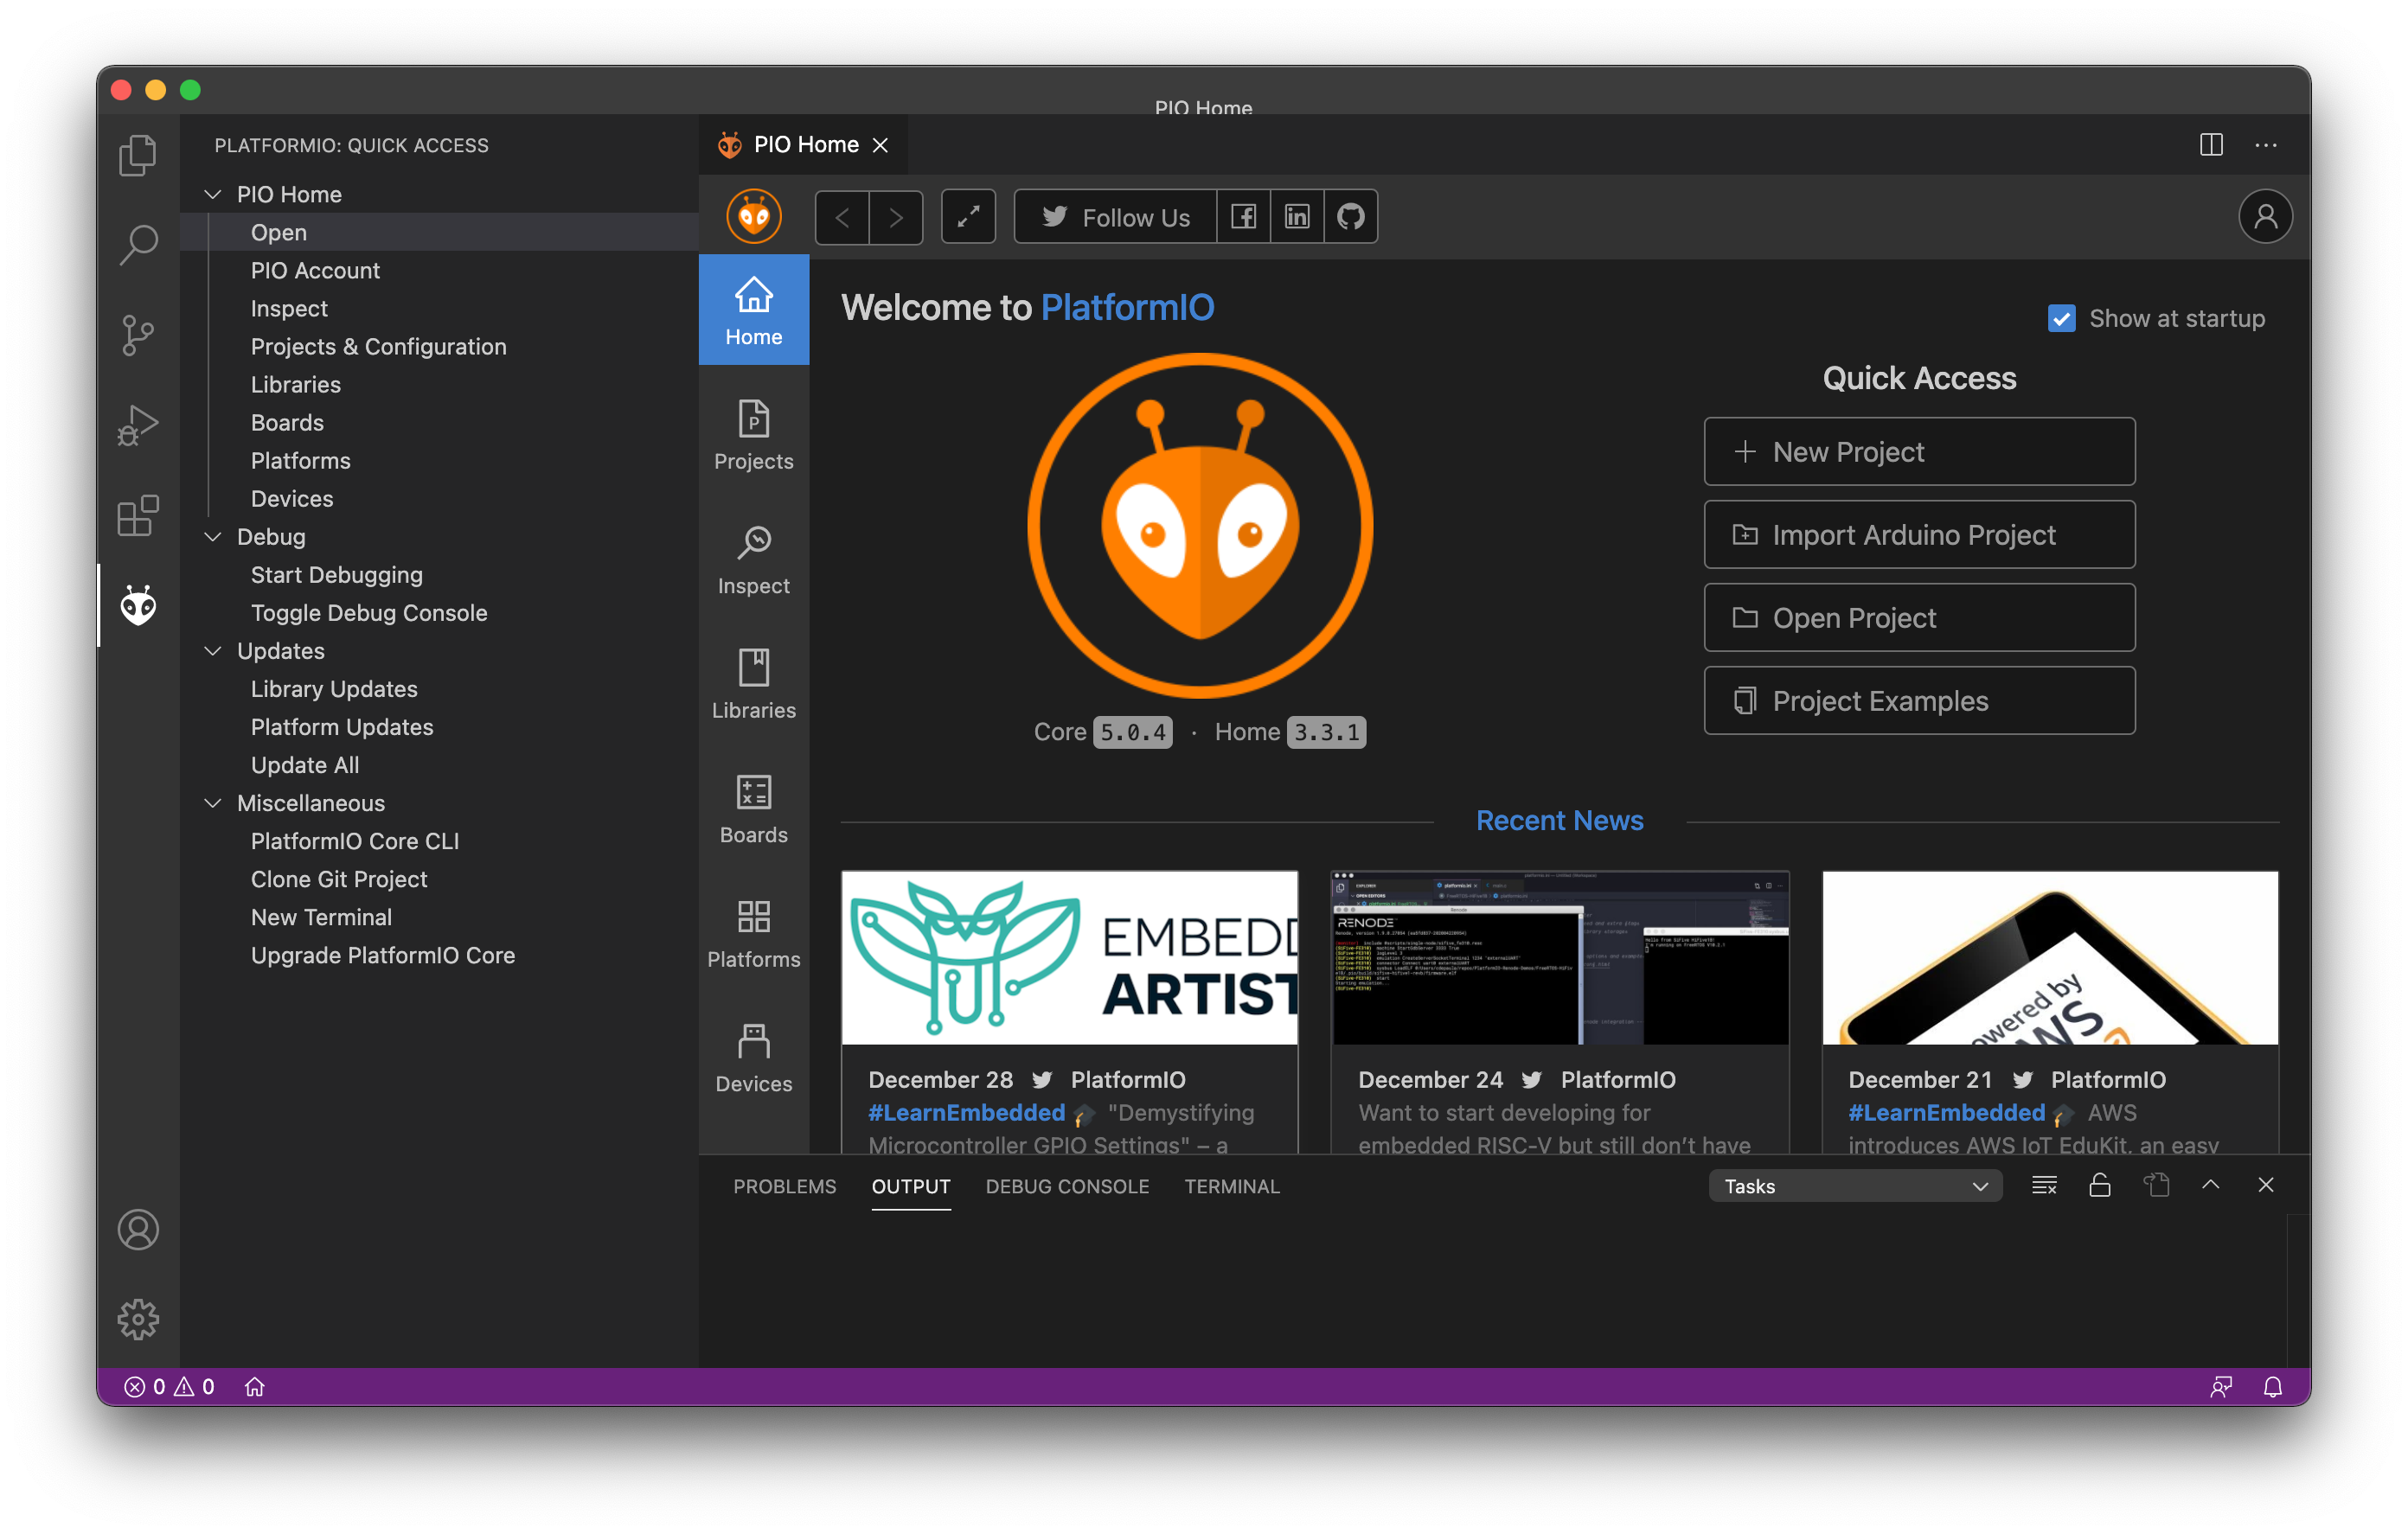
After the restart you’ll be seeing a new icon on the side-bar. (Alien ant?) Click on that icon and then click “PIO Home -> Open”. Now click on “New Project” on the on right side of the home screen. Enter the project name and select your Teensy board version.
4. Configuring your project
Before running your first program, I recommend making a few adjustments to the configuration.
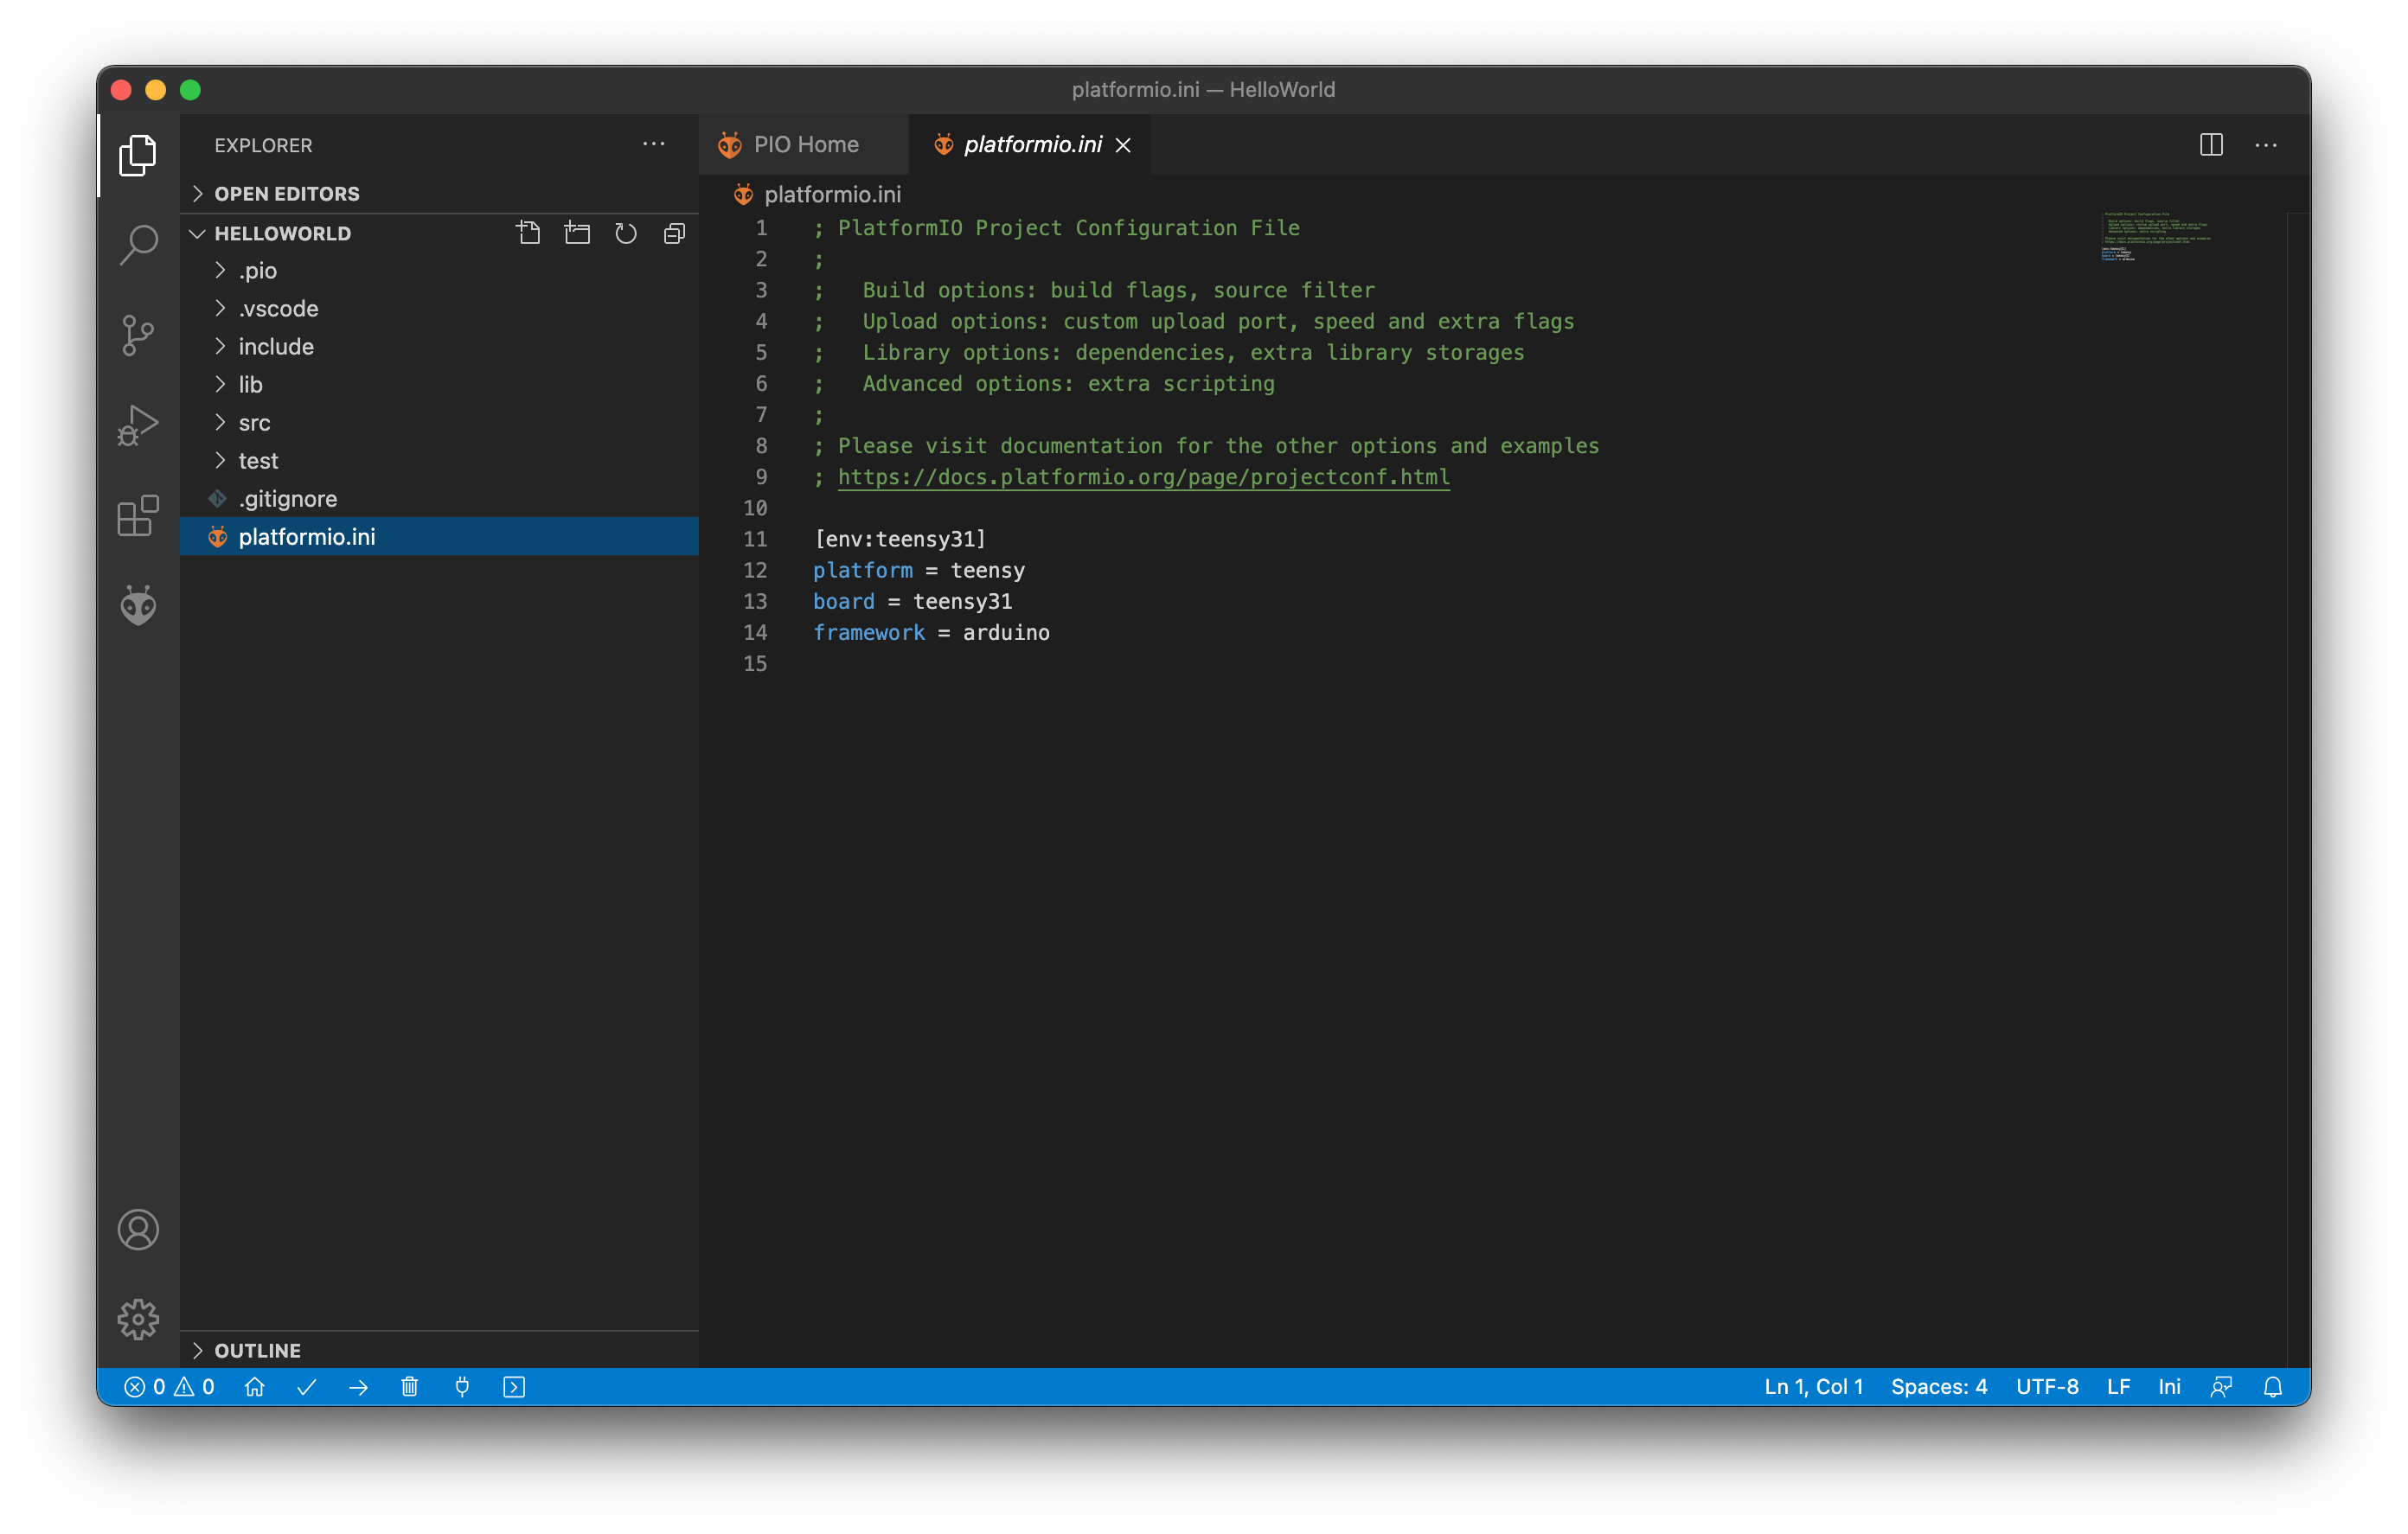
In order to do that you can click on “platformio.ini” in the project explorer. The build flag depends on your use-case. Default is -D USB_SERIAL. But there are many more options, like configuring the Teensy as MIDI or Audio device. And you can even combine these functionalities. You can find my most used options in the config file below. Feel free to copy/paste it to your project and adjust it to your liking.
; PlatformIO Project Configuration File
;
;   Build options: build flags, source filter
;   Upload options: custom upload port, speed and extra flags
;   Library options: dependencies, extra library storages
;   Advanced options: extra scripting
;
; Please visit documentation for the other options and examples
; https://docs.platformio.org/page/projectconf.html

[env:teensy31]
platform = teensy
board = teensy31
framework = arduino
upload_protocol = teensy-cli

build_flags = -D USB_SERIAL
;build_flags = -D USB_MIDI_SERIAL
;build_flags = -D USB_MIDI_AUDIO_SERIAL
More information about configuring a PlatformIO project for the Teensy is available here:
https://docs.platformio.org/en/latest/platforms/teensy.html
4. Hello World!
Ok, now let’s run our first program on the Teensy. Copy the following code to your main.cpp.
#include <Arduino.h>

const int LED_PIN = 13;

void setup() {
  Serial.begin(9600);
  Serial.println("Start blinking...");
}

void loop() {
  digitalWrite(LED_PIN, HIGH);
  delay(500);
  digitalWrite(LED_PIN, LOW);
  delay(500);
}
Make sure that your Teensy is properly connected with your computer. Now press the Upload button (right arrow) on the bottom bar. The program will be compiled, uploaded and run. Do you see the blinking light?
Conclusion
Using the Teensy in combination with Visual Studio Code and PlatformIO is a powerful alternative to vanilla Arduino. Ok, the “Hello World!” program from this tutorial really does not need this kind of extra power. But there’s more to come. In future posts I am going to explore the Teensy Audio Library, which allows you to create a broad range of audio gadgets.

